1. Overview of Heating Pipes
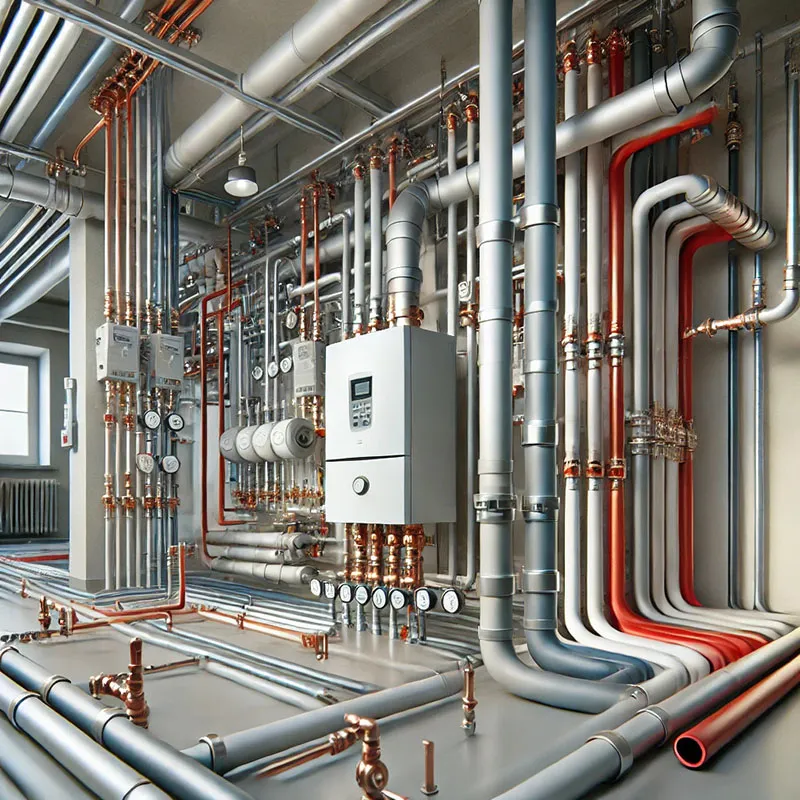
There are many common types of pipes, such as PB, PP-R, PR-X, copper pipes, aluminum-plastic pipes, etc. In different environments and different working conditions, it is particularly important to choose the best pipes. For example, domestic water pipes should be low-temperature resistant, long-life, and stable pipes, while heating pipes should be high-temperature resistant, oxygen-proof, and reliably connected. The creep resistance of exposed heating pipes cannot be ignored.
Common Classification of Heating Pipes
1. Plastic Pipes
(1) PB: Polybutene
Thermoplastic heating pipes are made of polybutene-1 resin with an appropriate amount of additives and extruded.
(2) PE-RT: Heat-resistant polyethylene
A thermoplastic heating pipe made of linear medium-density ethylene copolymer made of ethylene and octene, with appropriate amount of additives added and extruded.
(3) PP-R: Random copolymer polypropylene
A thermoplastic heating pipe made of random copolymer of propylene and appropriate amount of ethylene, with appropriate amount of additives added and extruded.
(4) PE-X: Cross-linked polyethylene
A heating pipe made of polyethylene or ethylene copolymer with a density greater than or equal to 0.94g/cm3, with appropriate amount of additives added, and with linear macromolecules cross-linked into a three-dimensional macromolecular structure through chemical or physical methods.
485078.webp)
2. Composite pipe
PAP aluminum-plastic pipe: PAP aluminum-plastic pipe is a new type of pipe made of a middle longitudinally welded aluminum pipe, inner and outer layers of polyethylene plastic, and hot melt adhesive between layers. It is now the mainstream choice in developed countries in Europe and the United States.
 (1)860794.webp)
3. Metal pipes
(1) Copper pipes: Copper pipes can be used for domestic water pipes, heating and cooling pipes. As installation pipes, they have the advantages of hard texture, corrosion resistance, high temperature resistance, and high pressure resistance. They can maintain their shape and strength at both low and high temperatures and are widely used in air conditioning and cooling pipes. However, due to their high price and welding process, they are used less and less in domestic water pipes and heating pipes.
(2) Stainless steel pipes: Stainless steel pipes are more advantageous. Thin-walled stainless steel pipes with a wall thickness of 0.6 to 1.2 mm are widely used in domestic water pipes and heating pipes. They are safe, reliable, hygienic, environmentally friendly, and durable.
239171.webp)
Selection of heating pipes
1. Selection of domestic water pipes
(1) PP-R: Not resistant to high temperatures and not resistant to oxygen permeation, but economical and easy to connect. It is very suitable as a low-temperature domestic water pipe system.
(2) PE-X: High temperature resistant, resistant to oxygen permeation, easy to bend, good thermal conductivity, mechanical connection, greatly reducing safety hazards caused by human factors, and perfect for domestic water pipes.
(3) Copper tubes and stainless steel tubes: resistant to high temperature and pressure, clean and antibacterial, but limited by cost factors, rarely used.
2. Selection of radiator pipes (concealed installation)
(1) PB: resistant to high temperature and easy to bend, but poor thermal conductivity, high requirements for installation environment, only suitable for radiators.
(2) PE-X: resistant to high temperature, anti-oxygen permeation, easy to bend, good thermal conductivity, mechanical connection, perfect for concealed radiators.
(3) Copper tubes and stainless steel tubes: resistant to high temperature and pressure, but limited by cost factors, rarely used.
3. Selection of radiator pipes (exposed installation)
(1) Aluminum-plastic pipes: resistant to high temperature, anti-oxygen permeation, good rigidity, aluminum-plastic pipes are the best choice for exposed radiator pipes.
(2) Stainless steel pipes: resistant to high temperature and pressure, but limited by cost factors and aesthetics, rarely used.
4. Selection of floor heating pipes
(1) PE-RT: not resistant to high temperature, but good thermal conductivity, easy to bend and install, which is a perfect match for low-temperature floor radiation systems.
(2) PE-X: High temperature resistance, oxygen-proof, easy to bend, good thermal conductivity, and also perfectly used in floor heating systems.
2. Heating pipe construction process
Heating pipe construction process
1. Galvanized steel pipe (threaded connection): pipe cutting, threading, pipe fittings, straightening, bending, thread painting, water pressure test, water flushing;
2. Galvanized steel pipe (welding): pipe cutting, beveling, straightening, butt joint, welding, pipe and pipe fitting installation, weld painting, water pressure test, water flushing;
3. Welded steel pipe (threaded connection): pipe cutting, threading, pipe fittings, straightening, water pressure test, water flushing;
4. Welded steel pipe (welding): beveling, straightening, bending, butt joint, welding, pipe and pipe fittings installation, water pressure test, water flushing;
5. Seamless steel pipe (welding): beveling, straightening, bending, butt joint, pipe and pipe fittings welding, water pressure test, water flushing; 2.6 PE-RT Pipe (floor heating): laying of insulation layer and wire mesh, cutting pipes, straightening, pipe layout, tying, fixing, water pressure test, and coordinating with ground pouring;
6. PE-RT pipe (ceiling heating): installation preparation, supporting formwork, tying lower steel bars, marking and drilling, casing installation,
7. Pipe installation, coordinating with pressure test, tying upper steel bars, pouring concrete, and comprehensive pressure test and debugging.
Preparation for heating pipe construction
1. Material requirements
(1) Pipe: carbon steel pipe, seamless steel pipe. The pipe shall not be bent, rusted, or have burrs, heavy skin, or unevenness.
(2) Pipe fittings: no deflection, square buckle, random buckle, broken wire, or inaccurate angle.
(3) Valves: regular casting, no burrs, no cracks, flexible and tight opening and closing, no damage to the thread, correct straightness and angle, strength meets the requirements, and no damage to the handwheel. With factory certificate, strength and tightness test shall be carried out in accordance with relevant regulations before installation.
(4) Other materials: steel, round steel, pipe clamp, bolt, nut, oil, hemp, gasket, electric welding rod, etc. The selection shall meet the design requirements.
2. Main machines and tools
(1) Machine tools: grinding wheel saw, threading machine, bench drill, electric welder, bender, etc.
(2) Tools: pressure case, bench vise, electric welding tool, pipe clamp, hand hammer, hand saw, adjustable spanner, etc.
(3) Others: steel tape measure, level ruler, plumb bob, chalk, small wire, etc.
3. Working conditions
Dry pipe installation: For dry pipes located in the trench, the debris in the trench should be cleaned up, the support bracket should be installed, and the trench cover should be installed before the trench cover is covered. Dry pipes located under the floor slab and on the top floor should be installed after the structure is capped or the structure enters the installation layer one level or more. The installation of the riser must be carried out after the accurate ground elevation is determined. Branch pipe installation must be carried out after the wall is plastered.
Heating pipe construction process
1.Installation preparation
Be familiar with the drawings carefully, cooperate with the progress of civil construction, reserve slots and install embedded parts.
According to the design drawings, draw the location, diameter, diameter change, reserved opening, slope, bracket position and other construction sketches of the pipeline, including the starting point, end, bend and node of the main pipe. Reserved opening, coordinate position, etc.
2. Main pipe installation: According to the construction sketch, prefabricate the pipe section, including: cutting pipe, threading, installing parts, straightening, checking the size, grouping and numbering according to the loop, and stacking neatly. Install the bracket and install it according to the design requirements or specified spacing. When installing the hanging card, first put the hanging stick on the steel in sequence according to the slope and sequence, put the hanging ring on the pipe according to the spacing position, then lift the pipe, put on the bolts and screw the nuts, and fix the pipe. When installing the pipe on the bracket, first put the pipe in place on the bracket, install the U-shaped card on the first section of the pipe, and then install the second section of the pipe. All subsequent sections of the pipe are carried out in the same way and tighten the bolts. The main pipe installation should start from the entrance or branch point. Before installing the pipe, check the pipe cavity and clean it. Apply lead oil and wrap the hemp on the thread head. One person holds the pipe flat at the end, and one person fixes the pipe relatively to the thread at the interface, slowly turns it into the thread, bites the front section of the pipe with a pipe clamp, and uses another pipe clamp to turn the pipe to a moderate tightness, aligns it with the mark when straightening, and requires the thread to be exposed 2 to 3 buckles, and removes the hemp head. Follow this method to install it until it is completed (the pipe passes through the expansion joint or the ditch, and the steel casing must be put on first). When making a horn bend, two elbows of about 75° should be simmered, and the groove should be sawed at the connection. The main pipe should be sawed into a duckbill shape. After assembly, it should be spot welded, leveled, aligned, and straightened before welding. The diameter of the joint of the horn bend must be equal to the diameter of the main pipe, and its bending radius should be about 2.5 times the diameter of the pipe. The branch valve should not be too far away from the branch point. If the branch is the lowest point of the system, a drain plug must be added before the branch valve. The water inlet and outlet of the gas tank should be opened at about 1/3 of the tank height. The threaded connection should be connected to the pipeline and straightened before installation. The vent pipe should be stable. If it is unstable, two clips can be installed. When the gas tank is located at the end of the system, a support and a hanging card should be installed. When using welded steel pipes, first select and straighten the pipes, clean the pipe bore, and transport the pipes to the installation site. The installation procedure starts from the first section; put the pipes in place and align them, align the pipe mouth to make the reserved mouth direction accurate, and fix them with gas welding after straightening (2 points for pipe diameters ≤50mm and 3 points for pipe diameters ≥70mm), and then weld. After welding, the pipeline should be kept straight. If there is an expansion joint, it should be pre-stretched according to the specifications during prefabrication and records should be made. Fix it in position and connect it to the pipeline. The guide bracket and fixed bracket of the corrugated expansion joint should be installed in the required position. And install valves, gas tanks and other auxiliary equipment separately. After the pipeline is installed, check whether the coordinates, elevation, reserved opening position and pipeline diameter change are correct, then find the straightness, use a level ruler to check the slope, and after the adjustment is qualified, adjust the U-shaped clamp of the hanging bolt to make it moderately tight and flat, and finally weld the stopper at the fixed clamp. Straighten or install the casing where the pipeline passes through the structure, fill the pipe hole, and add a temporary pipe plug at the reserved opening.
3. Check whether the position of the reserved holes on each floor is vertical, hang the wire, pick the eye, and plant the clamp. Transport the prefabricated pipeline to the installation site in the order of number. Before installation, remove the valve cover first, and put the steel casing on the pipe first, and install it from the first section according to the number. Apply lead oil and wrap the riser with hemp to align the interface and turn it into the buckle. A pipe clamp bites the pipe fitting, and a pipe clamp twists the pipe until it is moderately tight, align with the marking requirements during straightening, and the thread is exposed 2 to 3 buckles, the reserved opening is flat, and the hemp head is cleaned. Check whether the elevation, direction, and semicircular bend of each reserved opening of the vertical pipe are accurate and flat. Loosen the pre-planted pipe clamps, put the pipes into the clamps and tighten the bolts, use the hanger and plumb line to find the verticality from the first section of the pipe, straighten the steel casing, and finally fill the holes. The reserved openings must be plugged with temporary screws.
4. Branch pipe installation
Check whether the radiator installation position and the vertical pipe reserved openings are accurate. Measure the size of the branch pipe and the size of the lamp fork bend. (The difference between the center of the radiator and the center of the vertical pipe reserved opening). For branch pipes, measure the size of the branch pipe, subtract the amount of the lamp fork bend, then cut the pipe, thread it, simmer the lamp fork bend and straighten it. Apply lead oil to both ends of the lamp fork bend, wrap it with hemp, install the oil, connect the radiator, and clean the hemp head. For concealed or semi-concealed radiators (see Chapter 6 for details), the lamp fork bend must be adapted to the corner of the furnace plate slot to achieve beauty. Use a steel ruler, a level, and a plumb line to check the slope of the branch pipe and the parallel distance to the wall, and check whether the vertical pipe and radiator have moved. Perform system pressure test and flushing according to the designed or specified pressure. After passing the acceptance procedures, the water should be drained. For vertical branch pipe diameter changes, cast iron cores should not be used. Variable diameter pipe clamps or welding methods should be used.
5. First, contact the heat source for heating, determine the heating range according to the heating area, formulate the division of labor for heating personnel, check whether the drain valve in the heating system is closed, and whether the valves of the main, vertical, and branch pipes are open. Fill the system with softened water, and start by opening the vent valve at the highest point of the system, and arrange for someone to watch it. Slowly open the valve of the system return main pipe, and close the vent valve after the vent valve at the highest point sees water. Then open the water supply pipe valve at the main inlet, and the high-point vent valve should be opened repeatedly several times until the cold air in the system is exhausted. After half an hour of normal operation, start to check the entire system. If there is any place that is not hot, find out the reason first. If flushing and maintenance are required, close the supply and return valves to drain water, then open and close the supply and return valves to drain water and flush. After flushing, follow the above procedure to operate the heating system until it is normal. When heating in winter, temporary heating measures must be taken to keep the room temperature above +5℃. If there is uneven heat, adjust the valves on the risers and branches of each branch to basically achieve balance, then conduct formal inspection and acceptance, and go through the acceptance procedures.
Heating Pipe Construction Quality Standard
1. Guarantee Items
(1) The water pressure test results of the concealed pipeline and the entire heating system must meet the design requirements and construction specifications.
Inspection method: Check the system or partition (section) test records.
(2) The position and structure of the pipeline fixing bracket must meet the design requirements and construction specifications.
Inspection method: Observe and check against the design drawings.
(3) The installation position of the expansion joint must meet the design requirements and should be pre-stretched in accordance with relevant regulations. Inspection method: Check against the design drawings and check the pre-stretching records.
(4) It is strictly forbidden to weld the branch pipe at the butt welds and bends of the pipeline. The distance between the interface weld and the bend point, support and hanger edge must be greater than 50mm. Inspection method: Observation and measurement inspection.
(5) The material, specification and wrapping method of the filter screen of the sludge remover must comply with the design requirements and construction specifications. Inspection method: Disassembly inspection.
(6) When the heating supply system is completed, the quality of the purge must be checked. Inspection method: Check the purge records.
2. Basic items
(1) The slope of the pipeline should meet the design requirements. Inspection method: Use a level (level ruler), pull line and measurement to check or check the measurement records.
(2) The threaded connection of the carbon steel pipeline should be clean and regular, without broken or missing threads, and the connection should be firm. The root of the pipe thread should be exposed for 2 to 3 threads, and there should be no exposed oil hemp and other defects at the interface. Inspection method: Observation or disassembly inspection.
(3) The welding of carbon steel pipelines should meet the requirements of design specifications for weld straightness and weld reinforcement surface, and the weld surface should be free of burn-through, cracks, obvious nodules, slag inclusions, pores and other defects, and the weld wave should be uniform. Inspection method: Observation or inspection with welding inspection ruler.
(4) The valve installation should meet the design requirements and construction specifications for model, specification, pressure resistance and tightness test results. The installation position and inlet and outlet directions should be correct, the connection should be firm and tight, the opening and closing should be flexible, the direction should be easy to use, and the surface should be clean. Inspection method: manual inspection and inspection of factory certificates.
(5) The installation of pipeline supports (supports) and pipe seats (piers) should meet the following requirements: correct structure, flat and firm burial, neat arrangement, and close contact between the support and the pipeline. Inspection method: observation and manual inspection.
(6) The sleeves installed in walls and floors should meet the following requirements: the top of the sleeve in the floor should be at least 20 mm above the ground. The bottom should be flush with the ceiling surface, and the sleeves at both ends of the wall should be flush with the finishing surface. Firmly fixed, flush pipe mouth, uniform circumferential seam. Inspection method: Observation and measurement.
(7) Painting of pipes, boxes and metal brackets shall comply with the following provisions: the type of paint and the number of times of painting shall meet the design requirements, good adhesion, no peeling, blistering and missing paint, uniform paint film thickness, consistent color, no flow and pollution. Inspection method: Observation and inspection.
Protection of finished heating pipes
The installed pipes shall not be used as hanging loads or supports, nor shall they be stepped on. When transporting materials, machinery and welding, specific protective measures shall be taken, and the finished walls and floors shall not be dirty or damaged. After the pipes are installed, the handwheel of the valve shall be removed and kept well, and installed uniformly upon completion.
Quality issues that should be paid attention to
The slope of the pipe is uneven. The cause is that the main pipe is opened again after installation, the interface is not straightened later, or the hanging card is inconsistent in tightness, the riser clamp is not tightened, the lamp fork is unevenly bent, and the connection survey is not carried out when the pipe branch is prefabricated. The vertical pipe is not vertical, mainly due to the inaccurate size of the branch pipe, pushing and pulling the vertical pipe. The layered vertical pipe is not aligned up and down, and the distance from the wall is inconsistent. This is mainly caused by not hanging the wire when cutting the plate hole. The branch pipe lamp fork is inconsistent up and down, mainly because the size of the bend is different, the angle is uneven, and the length is different. The casing is exposed on both sides of the wall or under the prefabricated board. The reason is that the casing is too long or the steel casing is not welded with the iron frame. The head is not cleaned up, because the operator did not clean it in time. The pipeline is blocked during pressure testing and heating. It is mainly caused by the fact that the reserved opening is not equipped with a temporary plug during installation, and debris falls into it.
Key points for measuring air conditioning water valve components
Calculate the length in "meters" according to the center line of the pipeline shown in the figure, without deducting the length occupied by the valve (including pressure reducer, heat meter, corrugated compensator, etc.) and pipe fittings. Indoor pipelines and outdoor pipelines should be measured separately and described in the corresponding list feature description.
Key points for project feature description
Name, material, specification, connection form, etc. Pipeline name: galvanized steel pipe, welded steel pipe, seamless steel pipe, PB pipe, PE-RT pipe, etc.; connection form: threaded connection, welding, etc.
736.webp)
328.webp)
294.webp)
476.webp)
420.webp)
146.webp)
460.webp)
287.webp)

